How to Measure Indoor LED Brightness for Office Environments
Measure ambient light, set display brightness, and verify uniformity. This guide provides a practical method for determining correct nit settings in office environments using standard tools and observation.
- Start calibration by measuring the room's ambient light first.
- Use a light meter or camera to capture nit levels accurately.
- Adjust brightness in small increments to match the office environment.
- Verify uniformity across the display to avoid hotspots or dark zones.
- Document final settings for consistency during future maintenance.
Why Office Environments Require Different Brightness Settings
Office LED displays operate under controlled lighting conditions that differ significantly from retail or industrial spaces. The goal is to match the screen output to the surrounding light level while maintaining comfortable viewing. Excess brightness causes glare and eye strain, while insufficient output makes content difficult to read during daylight hours.
This process is a standard part of installation and maintenance. It ensures that the display performs as intended across different times of day and lighting configurations. The method below uses basic tools and direct observation to achieve a reliable result.
What You Need Before Starting
Gather the following items before beginning the calibration process:
- A calibrated light meter or a smartphone app with a lux function.
- A white patch or paper with a known reflectivity value.
- A camera or smartphone for visual verification.
- The display control panel or management software access.
- A reference white patch for color temperature consistency.
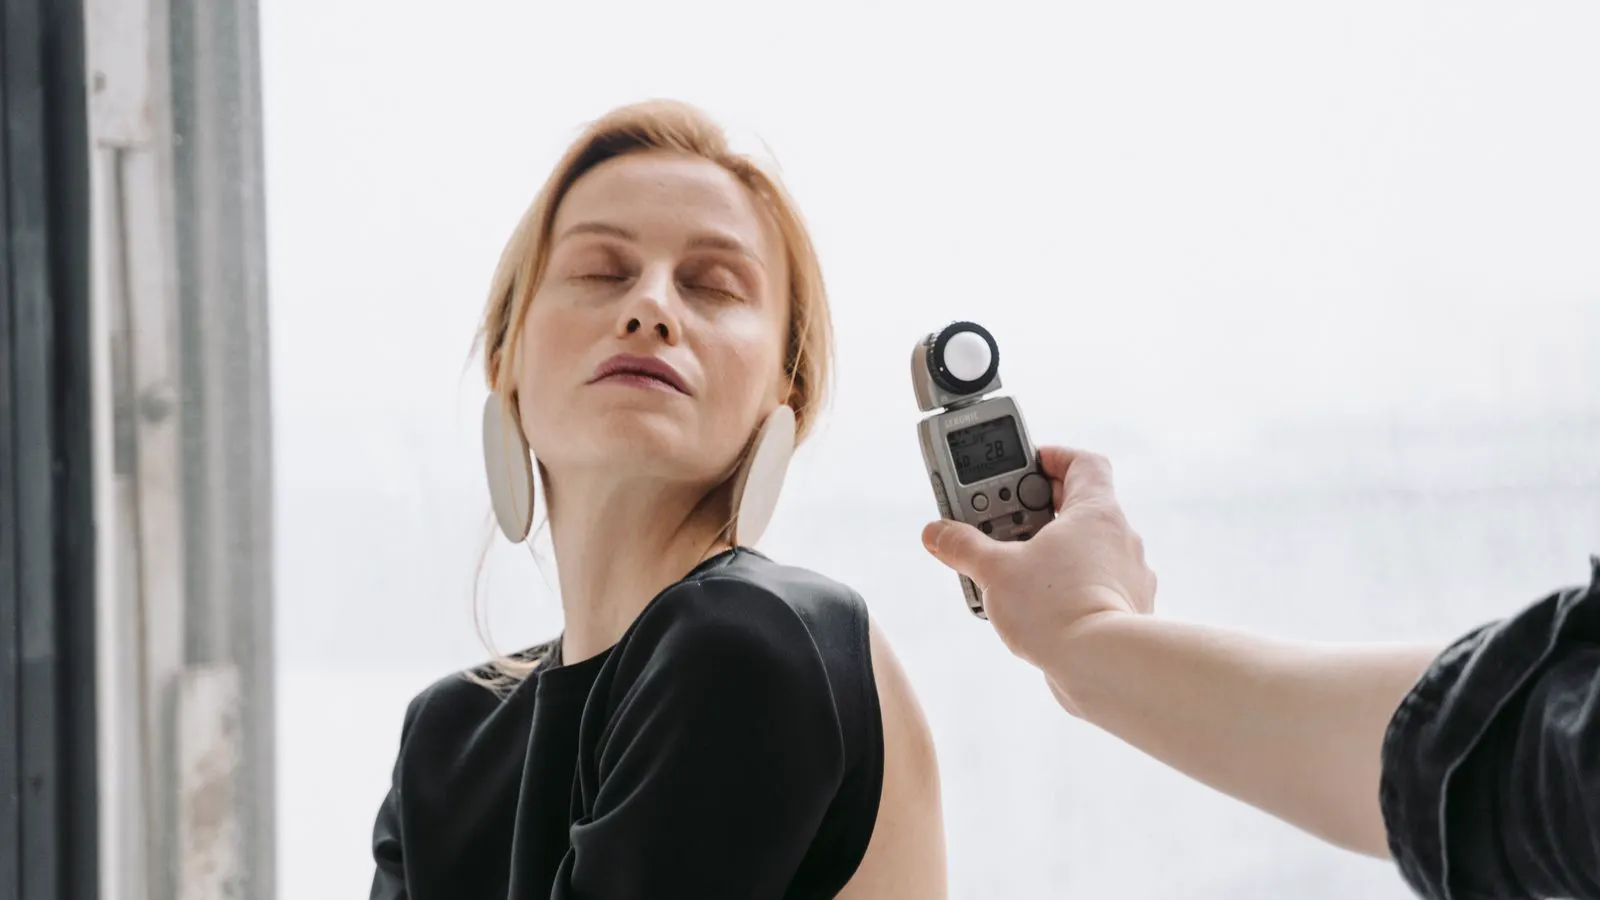
The light meter is the primary tool. It measures ambient light in lux and screen output in nits. A white patch helps stabilize the meter reading by providing a consistent reflective surface. The display control system allows you to adjust brightness, contrast, and color temperature.
Step 1: Measure Ambient Light in the Office
Turn off all unnecessary light sources. Close blinds or adjust natural light to the typical working condition. Measure the ambient light at the viewer’s eye level.
Record the lux reading. Typical office environments range from 200 to 500 lux during daylight hours with blinds open. Lower values are common in enclosed rooms or at night. This baseline determines the starting brightness level.
Reason: Ambient light is the primary factor affecting perceived screen brightness. Matching the display output to this level reduces eye strain and improves content visibility.
Step 2: Set the Display to a Neutral White Level
Access the display’s internal menu. Set the brightness to 50 percent and the contrast to 100 percent. Choose a neutral white picture mode, often labeled as “Standard” or “Office.” Disable any automatic brightness or power-saving features.
Display a solid white image at full screen. This image acts as the reference for brightness measurement.
Reason: A neutral white image provides a stable baseline. Automatic features can interfere with calibration, so disabling them ensures consistent readings.
Step 3: Measure Screen Brightness with the Light Meter
Place the light meter directly in front of the screen, perpendicular to the display surface. Keep the meter close to the screen to minimize ambient light interference. Record the nit reading.
Compare the nit reading to the ambient lux level. A common starting point is a 1:1 ratio, but this varies by room size and window placement. If the screen is too bright, reduce the brightness setting. If it is too dim, increase it.
Reason: Direct measurement eliminates guesswork. The light meter provides an objective reading that can be compared to ambient levels.
Step 4: Adjust Brightness in Small Increments
Change the brightness setting in increments of 10 percent. Re-measure the screen after each change. Aim for a nit level that is slightly above the ambient lux level. For example, if the ambient light is 300 lux, target a screen brightness of 350 to 400 nits.
Avoid maximum brightness settings unless the room has very high ambient light. High brightness can cause visible banding and reduce panel lifespan over time.
Reason: Small adjustments prevent overshooting the target. Gradual changes allow you to find the optimal balance between visibility and comfort.
Step 5: Verify Color Temperature and Uniformity
Display a grayscale pattern or a test image with multiple gray levels. Check for uniformity across the entire screen. Look for hotspots or dark areas that may indicate panel issues.
Adjust the color temperature to a neutral white, typically around 6500K to 7500K for office use. Use the white patch to verify consistency.
Reason: Uniformity and color temperature affect perceived brightness. A warm color tone can make the screen appear dimmer, while a cool tone can appear harsh.
Step 6: Test Under Different Viewing Conditions
Stand at the typical viewing distance for the office. Check the screen from different angles. If the room has multiple viewing zones, repeat the measurement at each location.
Adjust the brightness if necessary. Some offices have higher ambient light near windows and lower light in the center. You may need to accept a compromise setting or consider local lighting adjustments.
Reason: Viewing angle and distance affect perceived brightness. A setting that works at one angle may not work at another. This step ensures the display performs well in the real environment.
Step 7: Document the Final Settings
Record the final brightness, contrast, and color temperature settings in a maintenance log. Note the ambient light level and the date of calibration. Save a screenshot of the display menu if possible.
Reason: Documentation allows for quick recalibration if the environment changes. It also helps with troubleshooting if uniformity issues arise later.
Common Mistakes to Avoid
- Ignoring natural light changes. Blinds or window films can shift the ambient level significantly throughout the day.
- Using a light meter without a white patch. This introduces error into the reading.
- Setting brightness to maximum. This causes glare and reduces panel life.
- Skipping the uniformity check. Hotspots can be mistaken for brightness issues.
- Not documenting the settings. Future maintenance becomes difficult without a reference point.
Final Verification Step
After all adjustments, display a typical office document or presentation. View it from the main workstation. Check for glare, washed-out content, or eye strain. If the content is easy to read and comfortable, the calibration is successful.
Take a photograph of the screen for your records. Compare the photo to the light meter reading to confirm consistency. This final check ensures the display meets the needs of the office environment.
Quick Reference Table for Office Lighting Conditions
| Ambient Lux Level | Recommended Nit Target | Typical Office Scenario |
|---|---|---|
| 100-200 | 200-300 | Enclosed room, low light |
| 200-500 | 300-500 | Standard office, blinds open |
| 500-800 | 500-700 | Bright office, large windows |
| 800+ | 700-1000 | Near windows, high sun exposure |
Use this table as a starting point. Always measure the actual room conditions. The table provides a general framework for setting initial brightness levels.
When to Call a Technician
If the display cannot be adjusted to the target nit level, check the panel settings. Some LED displays have factory limits on brightness. If the uniformity check reveals dead pixels or significant hotspots, contact the manufacturer. These issues may require panel replacement or internal repairs.
Do not force the brightness to maximum if it does not match the environment. A display set too bright causes more problems than a display set slightly dim. Adjust the office lighting instead if possible.
Maintaining Your Calibration
Re-check the display every six months or after any lighting changes. New lighting fixtures, window films, or furniture can shift the ambient level. A simple lux measurement takes two minutes and ensures the display remains comfortable.
Keep the light meter and white patch in a drawer near the display. This makes recalibration easy when needed. A consistent environment leads to a consistent viewing experience for all office staff.
Measuring Indoor Screen Brightness: A Practical Approach
Measuring indoor screen brightness is a simple process when you have the right tools and method. Start with ambient light. Set the display to a neutral white. Measure and adjust in small steps. Verify uniformity and document the settings.
This method works for any office LED display. It does not require advanced equipment or specialized training. It only requires attention to detail and a commitment to a comfortable viewing environment.
By following these steps, you ensure that your office LED display performs as intended. The result is a screen that is easy to read, comfortable to view, and consistent across the office. This is the goal of any professional display installation.
Frequently asked questions
How often should I recalibrate my office LED display?
Every six months or after any change to the room lighting. Check ambient light levels and adjust the screen if necessary.
Can I use a smartphone to measure screen brightness?
Yes, but accuracy varies. A dedicated light meter is more reliable for precise calibration. Use a smartphone for basic checks only.
What if my office has mixed lighting conditions?
Set the display to the average ambient level. Adjust blinds or lighting to reduce contrast between bright and dim areas.
Does brightness affect the lifespan of an LED display?
Yes. Running at maximum brightness for extended periods can reduce panel life. Keep brightness at the lowest level that provides comfortable visibility.
How do I know if my display has a uniformity problem?
Display a solid white or gray image and look for hotspots or dark areas. If you see significant variation, contact the manufacturer for service.